02. Setting up a Notebook Instance
Setting up a Notebook Instance
The deployment project you will be working on is intended to be done using Amazon's SageMaker platform. In particular, it is assumed that you have a working notebook instance in which you can clone the deployment repository.
If you have not yet done this, please see the beginning of ** Lesson: Building a Model using SageMaker** where we have walked you by creating a notebook and cloning the deployment repository. Alternatively, you can follow the instructions below.
Step 1. Go to AWS SageMaker
First, start by logging in to the AWS console, opening the SageMaker dashboard, and clicking on Create notebook instance.
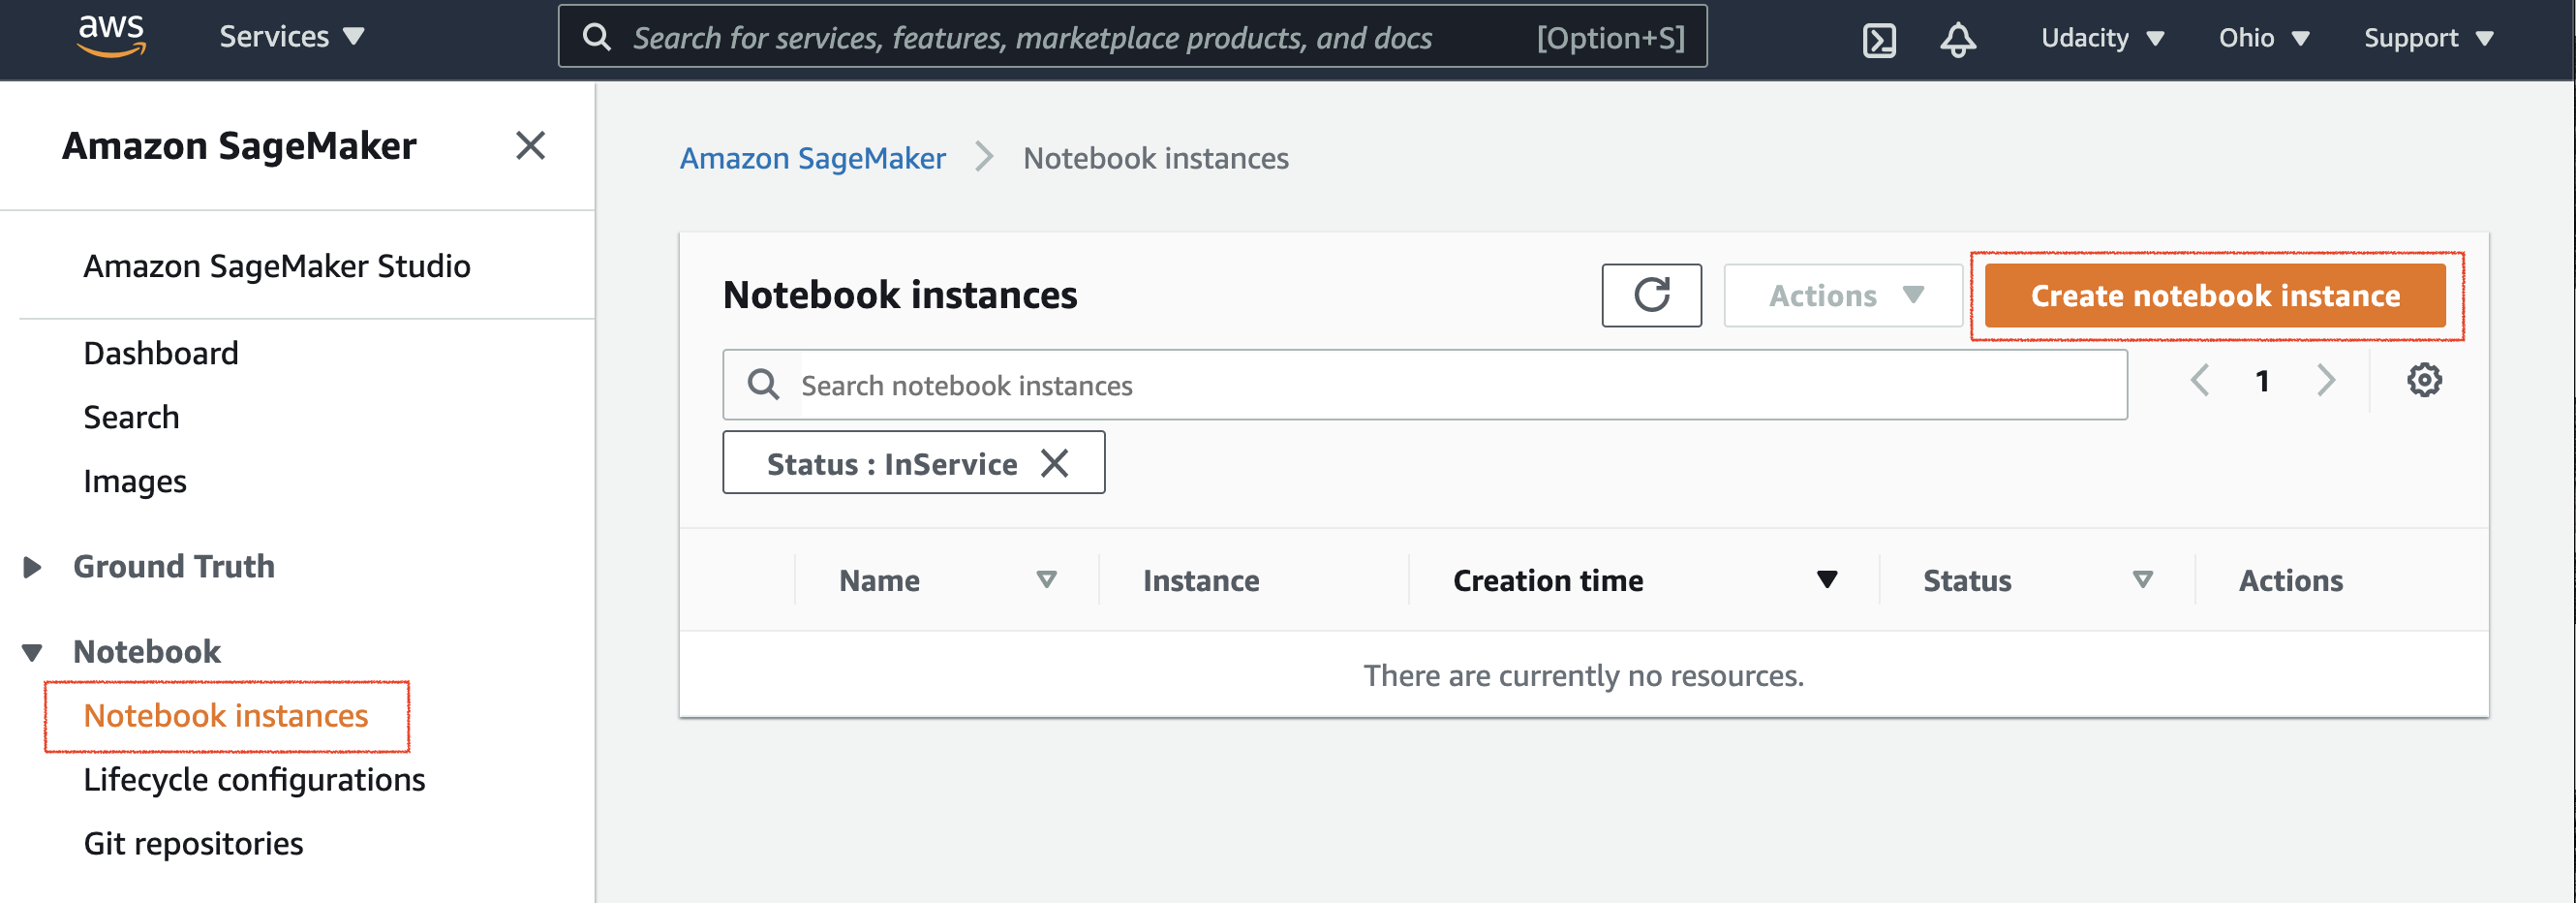
AWS SageMaker → Notebook instances service
Step 2. Create a notebook instance
The Create notebook instance wizard will come up, asking you the following information:
- Notebook instance settings - In this section, you may choose the notebook instance name of your choice. By default, a ml.t2.medium type is available. But, we will use ml.p2.xlarge for training a model and ml.m4.xlarge for deployment.
Note that your notebook may have a different name than the one displayed here.
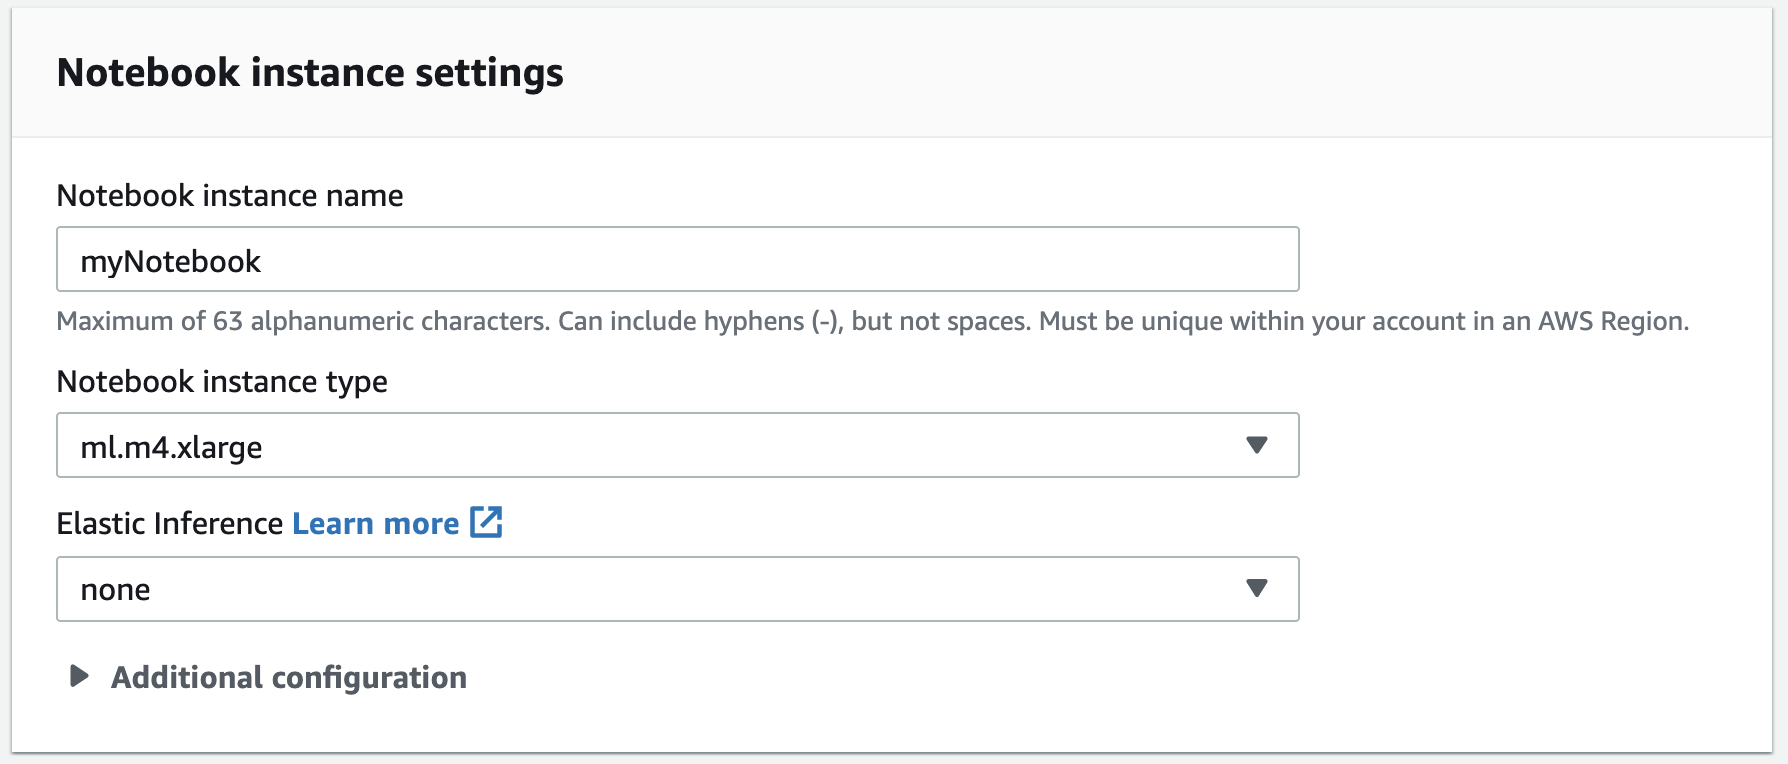
Create notebook instance → Notebook instance settings
- Permissions and encryption - Next, under IAM role field select Create a new role.
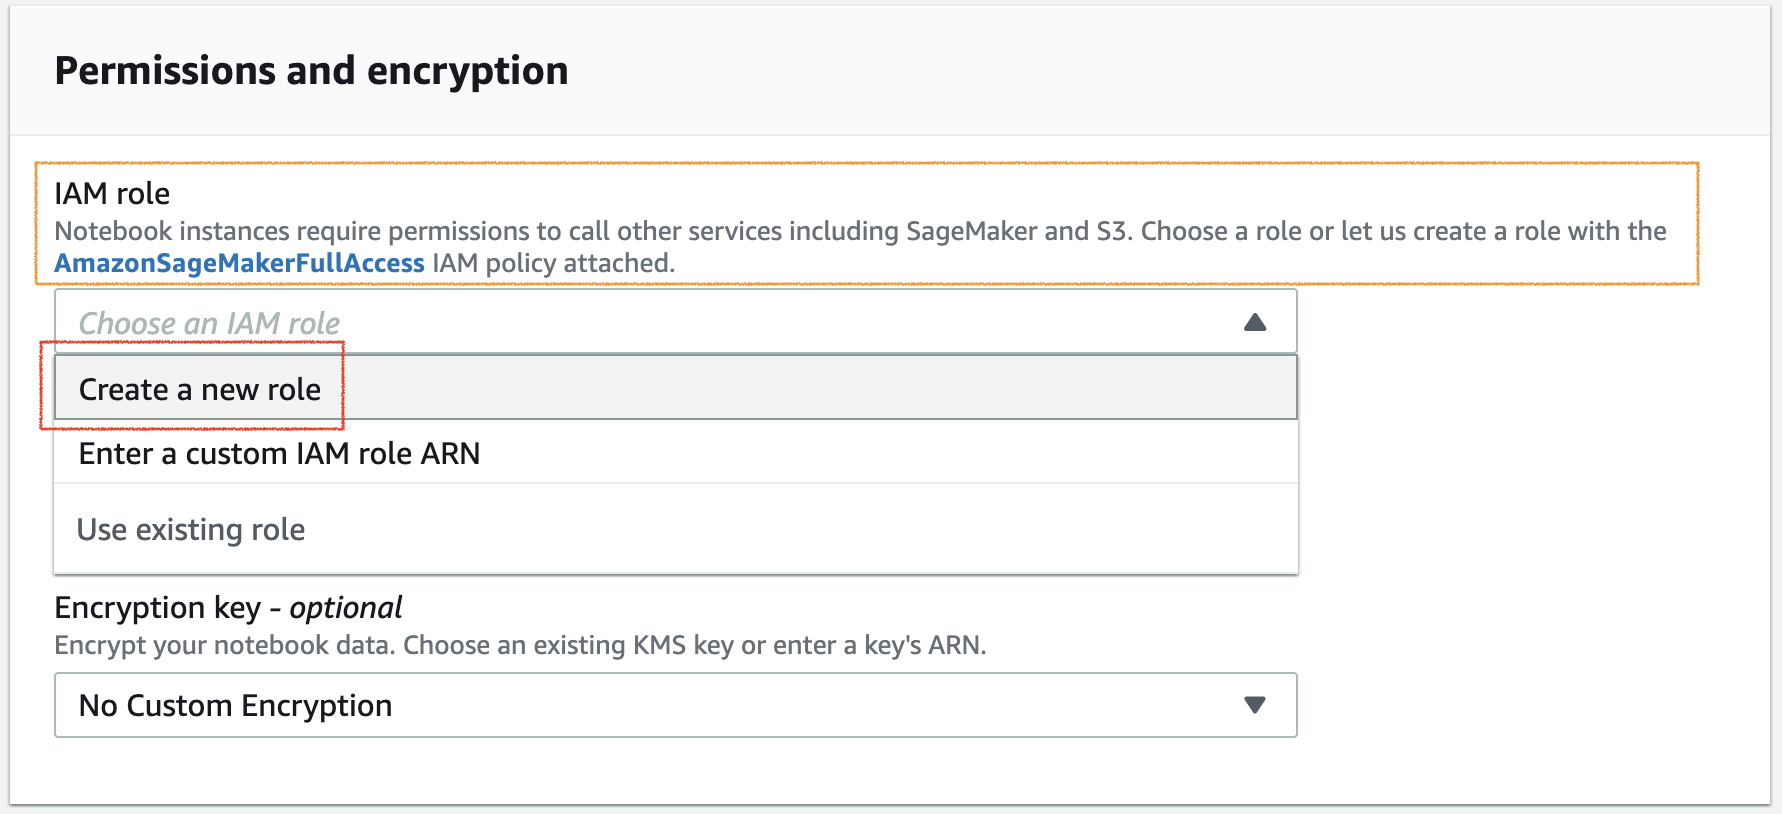
Create notebook instance → Permissions and encryption. Create a new IAM role
- Create an IAM role - You should get a pop-up dialog box, where you have to select None radio-button under S3 buckets you specify field, as is shown in the image below.
Note that the IAM role name that appears may be different than the one displayed here.
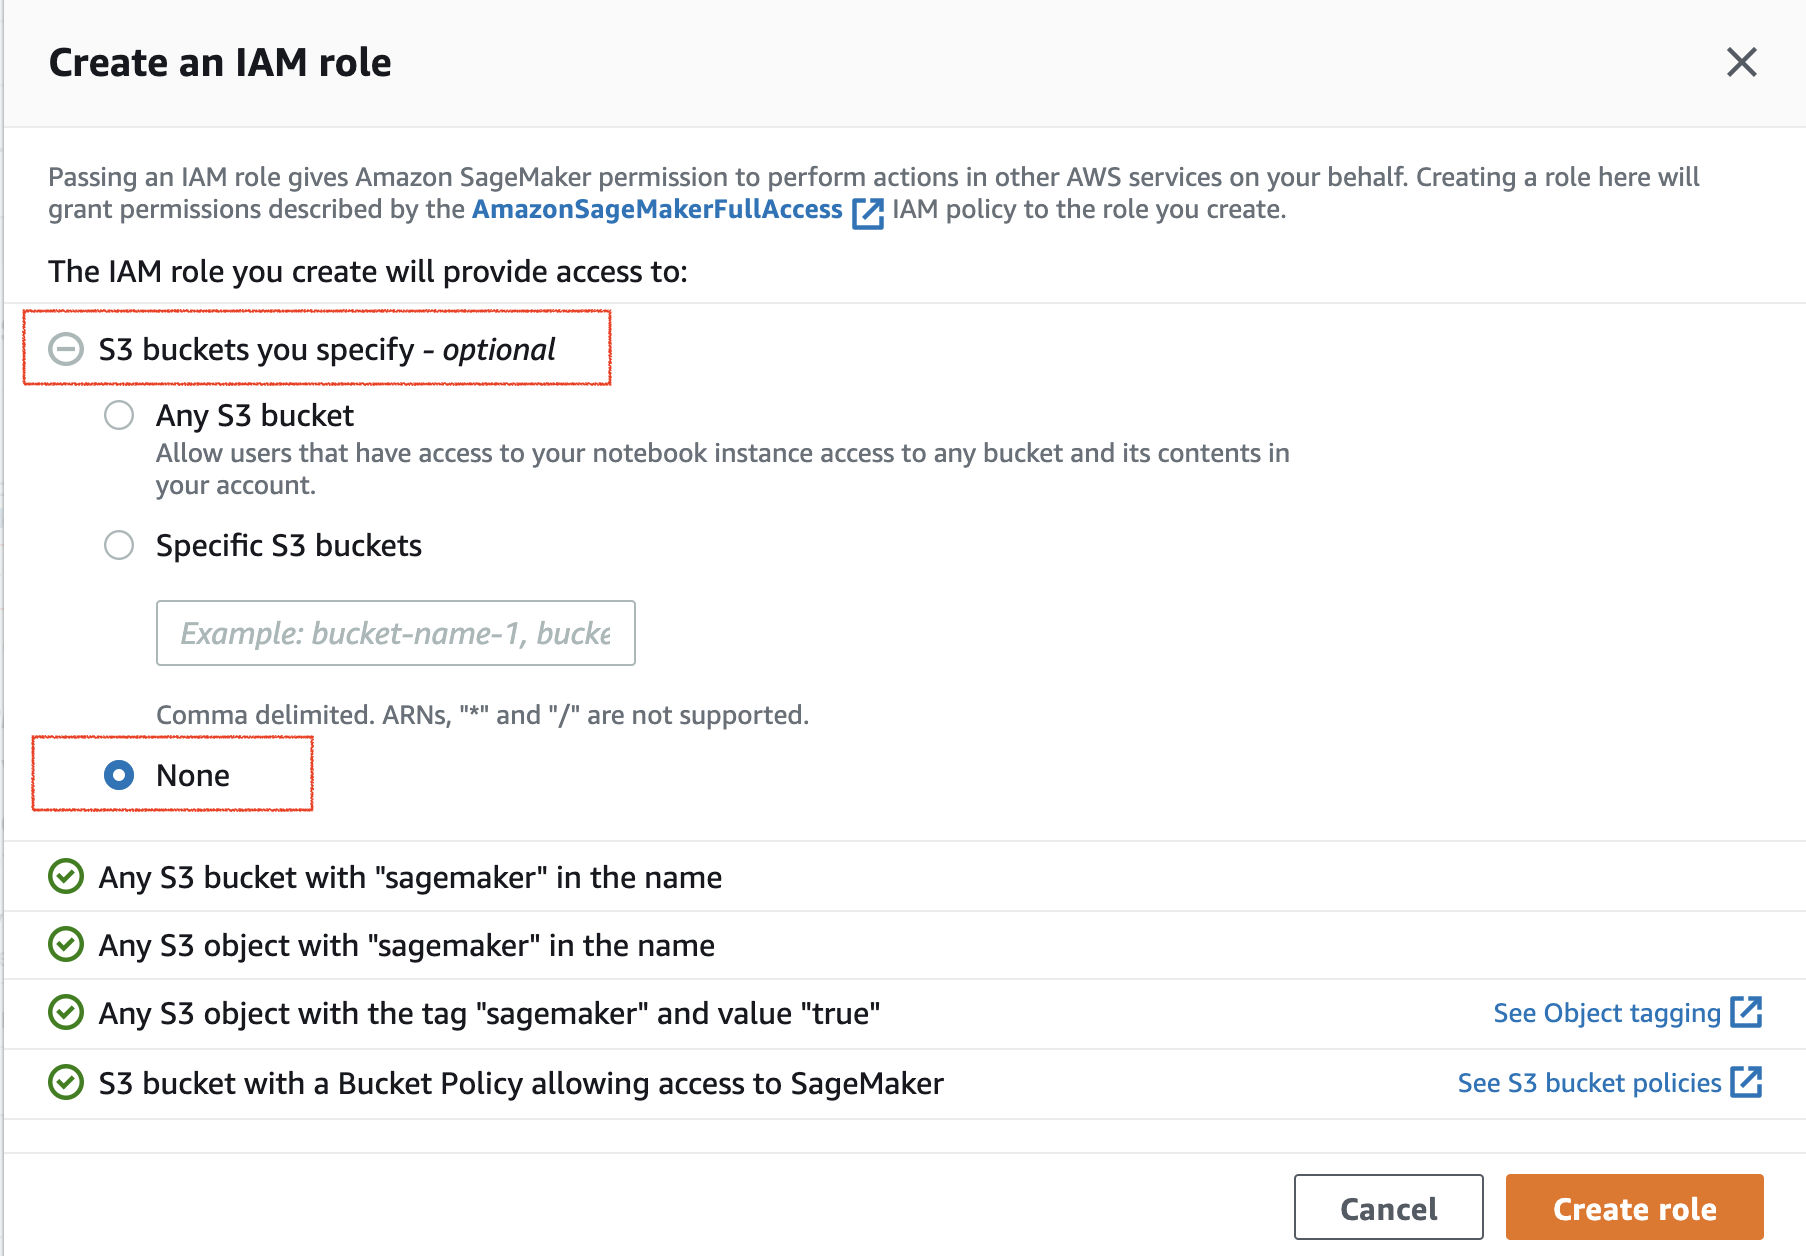
Create an IAM role dialog box
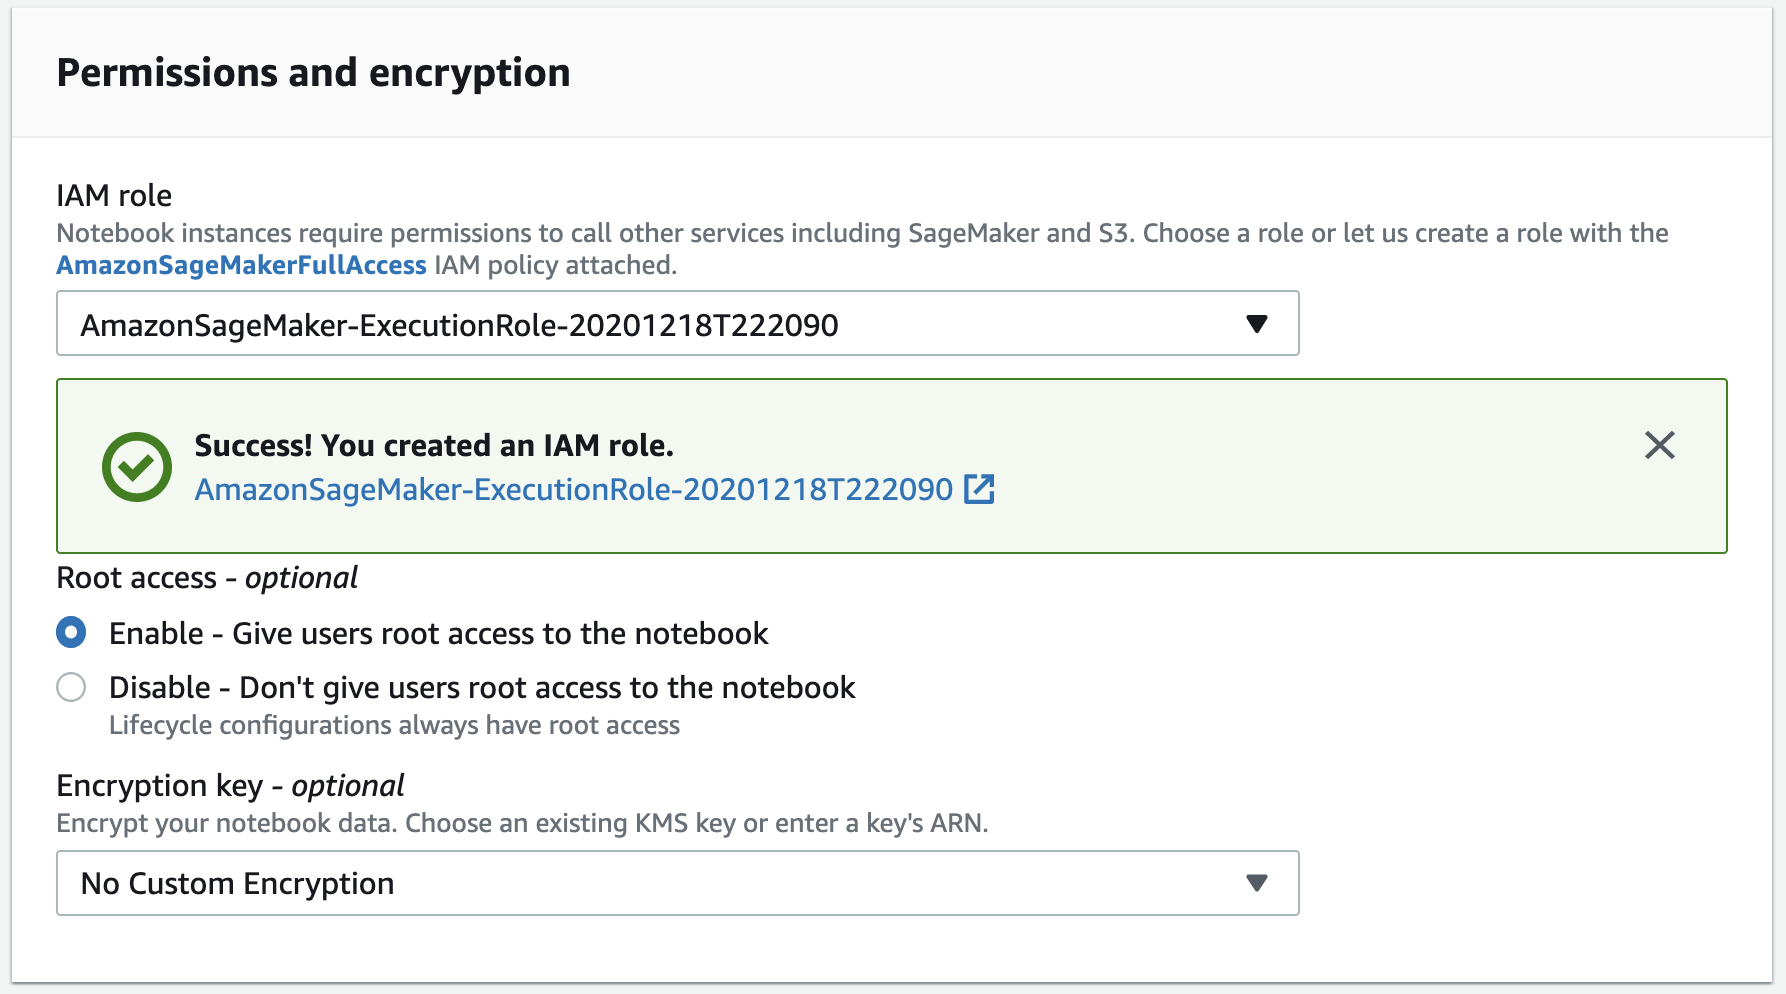
Success, creating a new IAM role
- Network - optional - Choose the No VPC option.
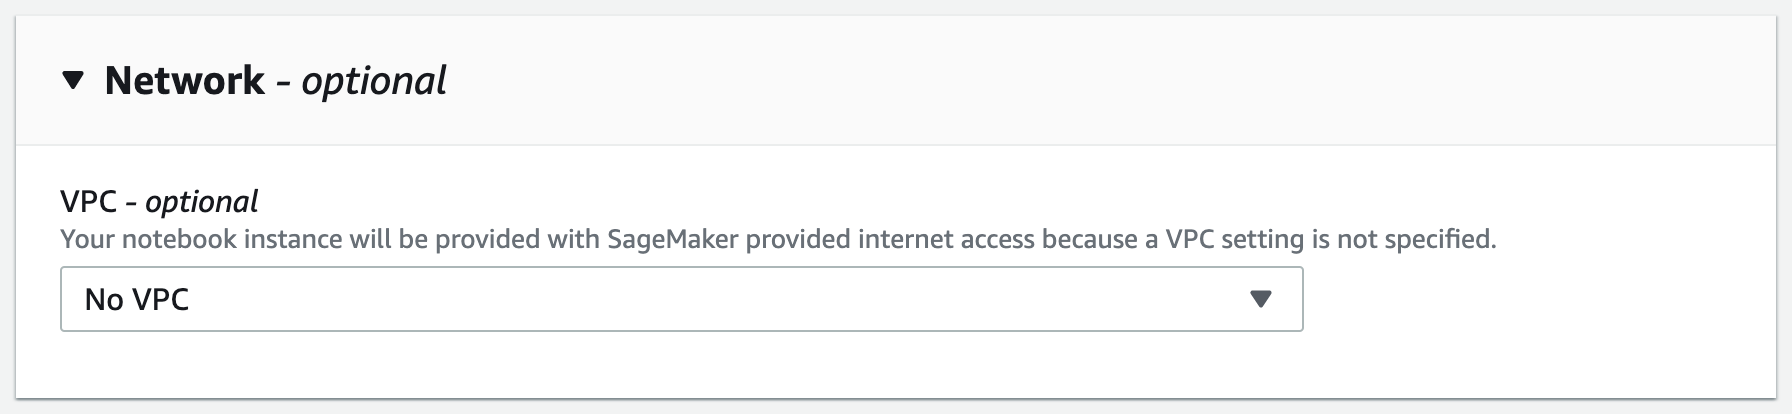
Create notebook instance → Network settings. Choose No VPC
- Git repositories - Here you will clone the
https://github.com/udacity/sagemaker-deployment.gitrepository to the current notebook instance only.
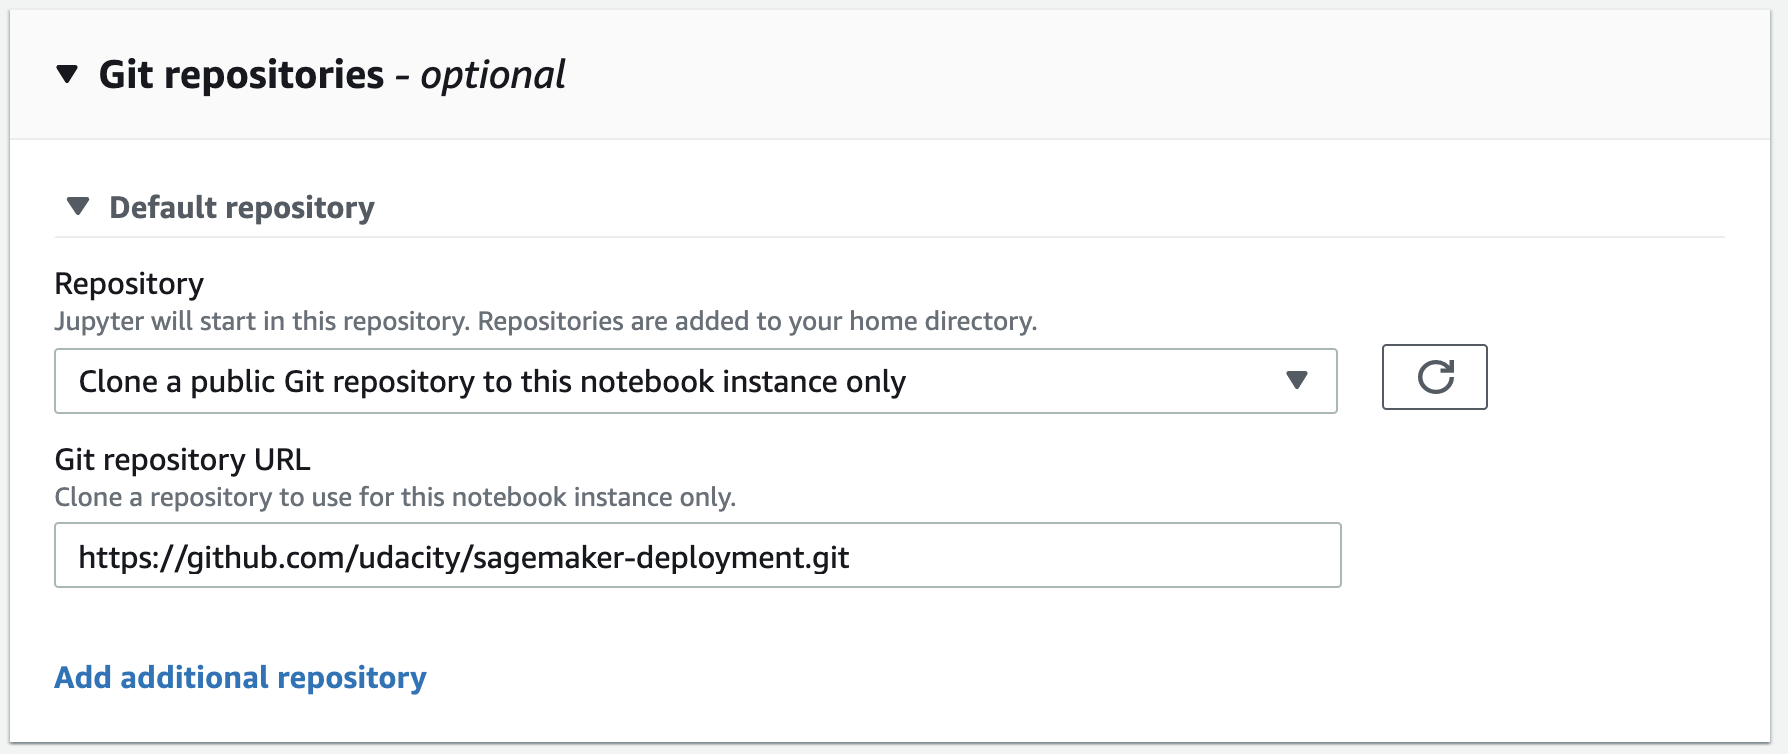
Create notebook instance → Git repositories setting
- You're done! Click on Create notebook instance button.
Your notebook instance is now set up and ready to be used! Once the Notebook instance has loaded, you will see a screen similar to the following snapshot.
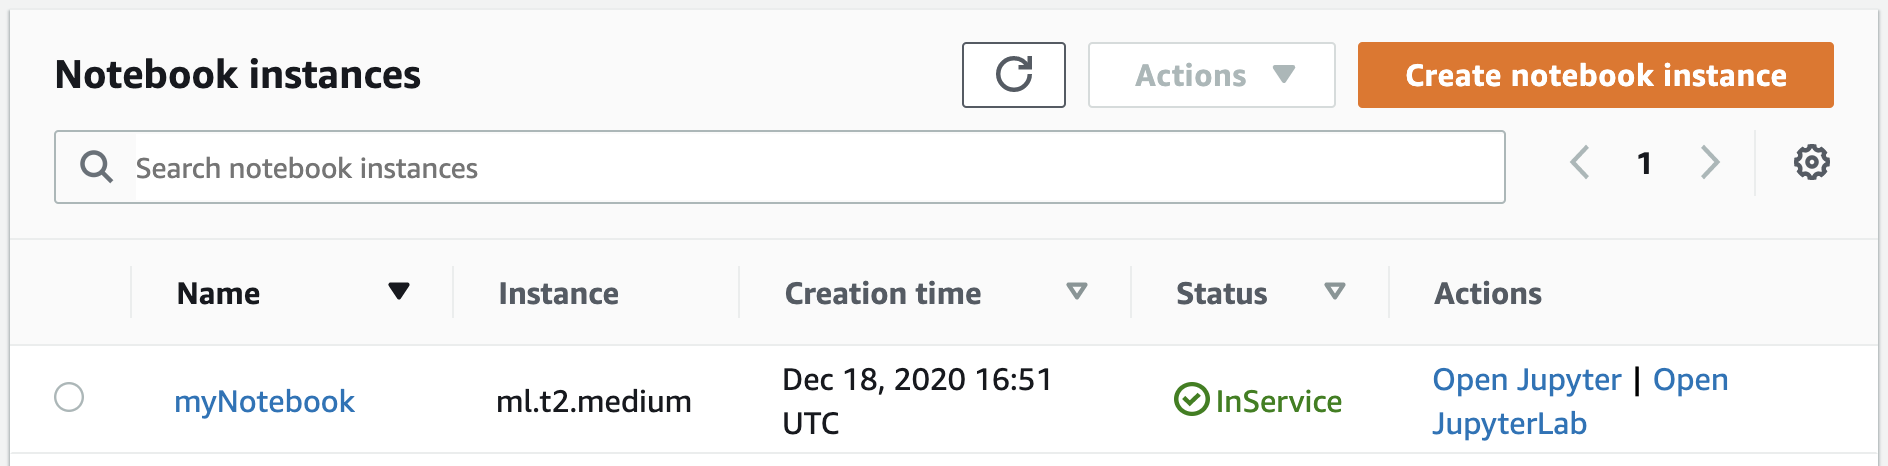
A successfully created notebook instance (Status: InService). You can access your notebook using the Open Jupyter Action.